


How to create a new Controls 4 Java project
There are two ways to get started. You can either use our Maven archetypes and configure everything manually, or you can use our NetBeans plugin. We would highly recommend using the NetBeans plugin as it also provides the integration of Controls.js Form Editor.
Install the NetBeans Plugin
WARNING! We recommend to use the development version of NetBeans plugin.
See how to use the development version.
1. Start NetBeans IDE.
2. Select from main menu Tools/Plugins.

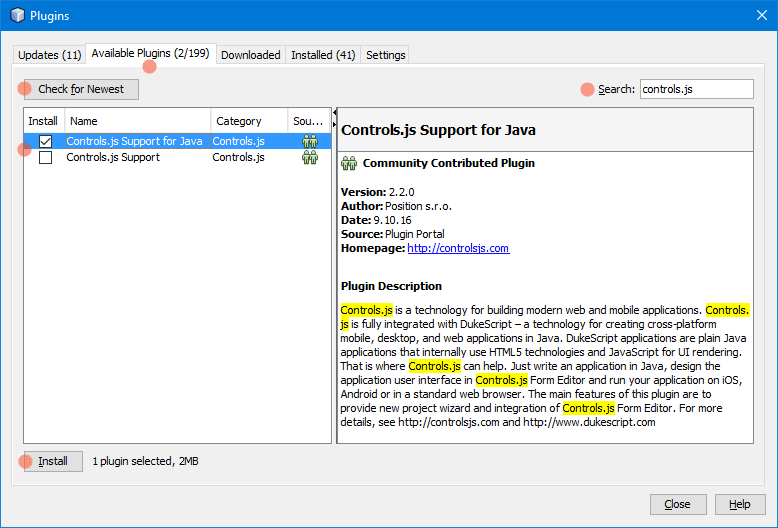
In the Plugins dialog:
3. Switch to Available Plugins tab.
4. Click Check for Newest to get latest updates.
5. Search for "Controls.js" plugins.
6. Install Controls.js Support for Java plugin. Check Install checkbox and then click Install button.
Create a new project
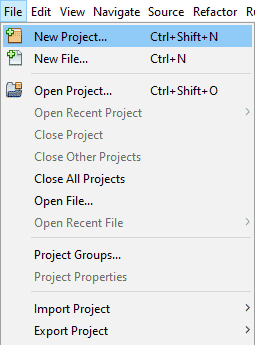
1. In IDE select from main menu File/New Project...
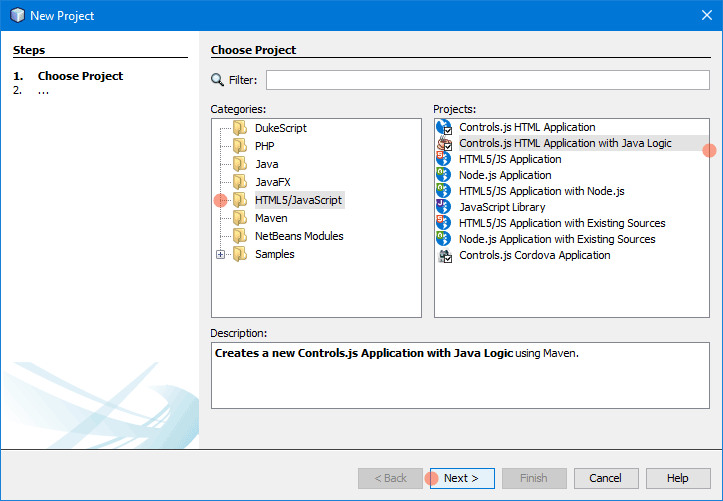
2. In the New Project Wizard switch to category HTML5/JavaScript or PHP.
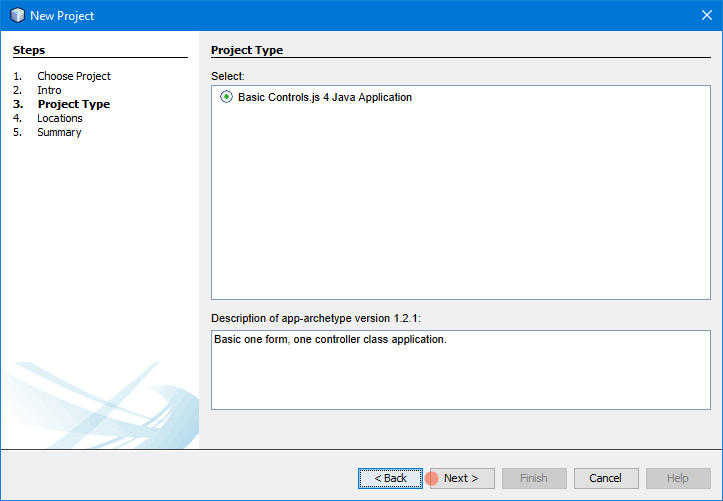
3. Choose Controls.js (HTML/Cordova/PHP) Application project type.
4. Click Next button.
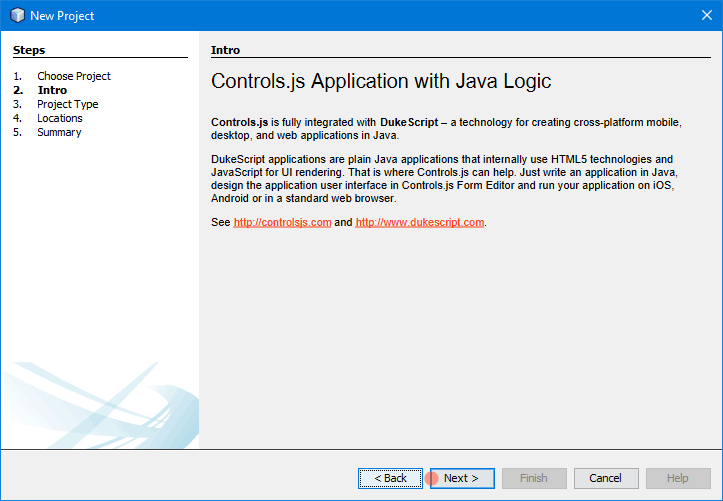
Follow the steps in New Project Wizard:
5. Click Next to switch to next wizard page.
6. Confirm Project Type and click Next.
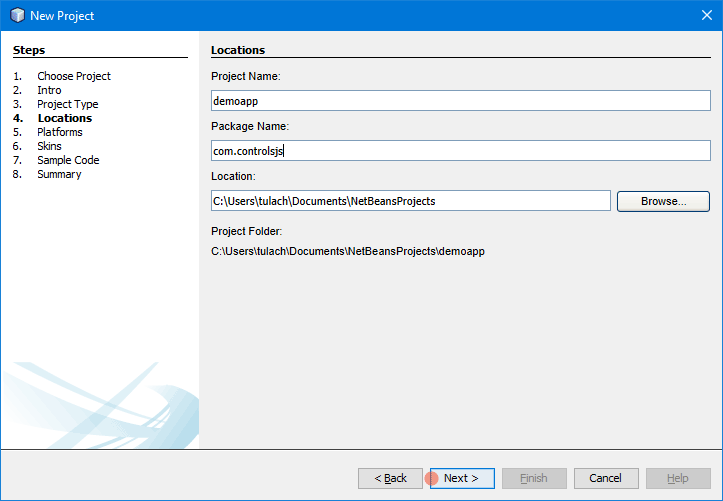
7. Specify the Project Name, Package Name and Project Location where new project will be created. Click Next.
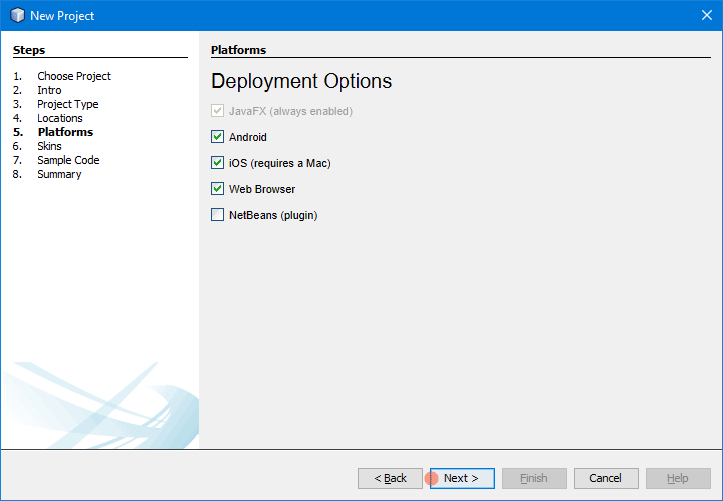
8. Select Platforms you would like your application to deploy. JavaFX is always enabled, because it's used for testing and debugging. Click Next.
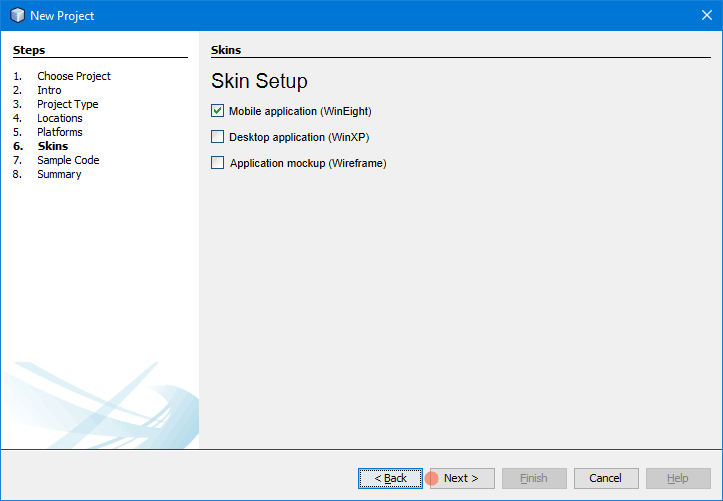
9. Choose which of out-of-box Skins you plan to use in your application. Click Next.
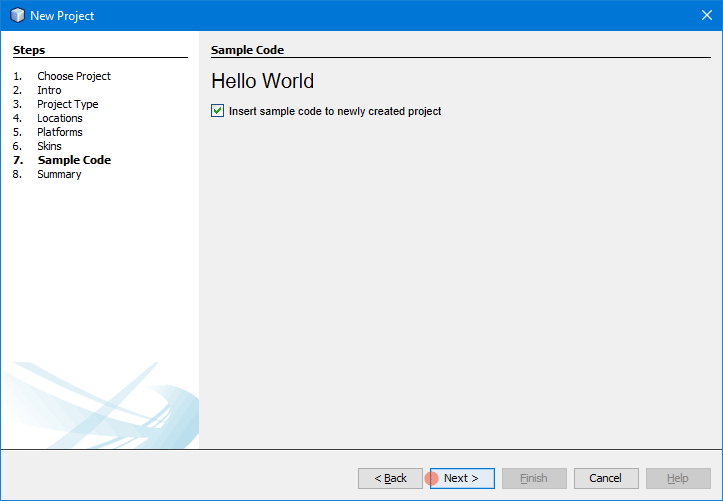
10. Select if you want to insert sample code into newly created project. Click Next.
11. Click Finish to create a project based on your inputs.
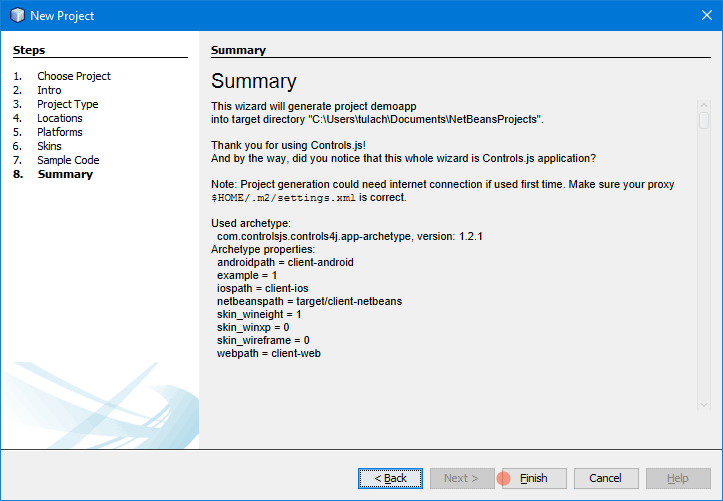
Congratulation! You have just created new Controls 4 Java project.
Tip: When you are editing @Model properties hit F12 or select Navigate/Goto Model/Controls.js Form... from NetBeans main menu. This allows you to edit (and create) Controls.js form using Controls.js Form Editor.